Friday, July 31, 2009

Banana Nutella Cinnamon Toaster


Heath saw Bobby Flay making this on Food Network one day last week, and told me about it. He said, " Is Nutella good? I've never had it." I said, "WHAAAAAAT?" Bananas and Nutella is my all-time favorite filling for crepes (which I might add, I haven't gotten to eat since my sweet Daddy made them for me on my birthday last year). So when Heath said he wanted to try this for breakfast one day, I told him to have at it! He made it Wednesday morning, and I thought it was really good- still not as drool-inducing as my favorite crepes, but I wouldn't refuse them. *wink wink*.

~Banana Nutella Cinnamon Toaster~

* bananas

* Nutella

* slices of your favorite sandwich bread

* butter

* sugar

* cinnamon

1.) create a sandwich by spreading some Nutella on one slice of bread, and slice banana on top (just to your liking, however much banana you like...and Nutella for that matter).

2.) spread margarine or butter on both sides of sandwich and sprinkle with cinnamon and sugar.

3.) Heat skillet over med/med high heat, and make your sandwich just like you would a grilled cheese. Enjoy!!

Wednesday, July 29, 2009

Pioneer Woman's Ranch-Style Chicken

Y'all...this is good. Really good. You should make it, and you should make it today. This recipe comes from The Pioneer Woman. If you haven't seen her site, go and take a peek. In addition to the delicious recipes she posts, she also blogs about photography, homeschooling, and home and garden. The marinade for this chicken is great and it is the perfect copycat of Outback Steakhouse's Alice Springs Chicken (which I order every time I go there). The Pioneer Woman says nothing about Alice Springs Chicken, but that's what it tastes like to me.Instead of following the directions the first time, we grilled it. Don't get me wrong- the flavor of the marinade still came through. It was just not the version of Alice Springs I had hoped for. So, the next time I made it, I followed directions...and it was pure yumminess (is that a word?)! Too bad I didn't get a picture the second time around- so you get the grilled version. =) We also added mushrooms the second time, which made it even better. I served it with fries, and a copycat version of Outback's honey mustard, which you'll find below. If you make it, let me know how you like it!

~Pioneer Woman's Ranch-Style Chicken~ I used 5 smallish boneless skinless breasts

Marinade:

* 1/2 c. dijon mustard

* 1/2 c. honey

* juice of 1/2 a lemon ( I didn't have one, so I used a couple of teaspoons of the bottled stuff)

* 1/2 teaspoon paprika

* 1/2 teaspoon salt

Mix together in a large bowl.

1.) Rinse your chicken breasts under cool water, and pat them dry.

2.) Placing them between two sheets of wax paper (one at a time), pound them to about 1/2-3/4 inch thickness.

3.) Add the chicken to the marinade bowl, and make sure they are coated well. Place in the fridge for at least an hour (I did mine more like 3 hours).

4.) While the chicken is marinating, go ahead and fry your bacon (we used 1/2 pound I believe- the kids didn't eat it on theirs).

5.) Clean out your skillet, but reserve about 1/4 of the bacon grease.

6.) Preheat oven to 400.

7.) Remove chicken from fridge and pour off excess marinade.

8.) Heat reserved bacon grease with an equal amount of canola oil in your clean skillet over med-high to high heat.

9.) When the grease is sufficiently heated, add chicken to skillet, taking care not to overcrowd. (I split it up and did 3 the first time, then the other 2.)

10.) Watch the chicken, and when it starts to get brown/black on the underside- flip, and do the same to the other side. Each side should cook for a maximum of 1-1 1/2 minutes. (I'm pretty sure mine took a little longer, but I have OCD when it comes to the doneness of meat or poultry).

11.) Place all chicken breasts on a baking sheet (I used a 9x13 dish), and put them in the oven to continue cooking for about 10 minutes.

12.) Remove the pan from the oven, and place a couple of bacon slices on each piece (and mushrooms if you are using them).

13.) Top with grated sharp cheddar cheese (we used a mexican blend), and return to the oven for an additional 5 minutes, or until cheese is melted and bacon is sizzling.

Serve immediately.


~Outback Honey Mustard~ so good! We all even dipped our fries in it instead of ketchup.

1 1/2 cups real mayonnaise

1/2 cup dijon mustard

1/2 cup honey

Stir all together, cover, and refrigerate for 1 hour before serving.

Sunday, July 26, 2009

No-Cook Peach Ice Cream


I love this time of year, when we can go to our local orchard and get fresh peaches. I am not crazy about the summer months, I am more of a fall/winter girl. However, I do love all the fresh fruits, and vegetables that are a product of the summer. As soon as I saw this no-cook ice cream recipe, I immediately knew that I wanted to make it with peaches. I have been having those peach milkshakes from Chick-Fil-A all summer, and they are delish, but I wanted to make some ice cream for everyone to enjoy. We had some friends over for dinner on the day I made this, and they seemed to enjoy it- as did Heath. I think he has eaten the majority of it on his own. =) I adapted this recipe from Spork or Foon. I thought with all the half-and-half, that it would be too icy or watery. So I switched the amounts of heavy cream, and half-and-half, and I think it turned out great- so my recipe below reflects those changes. FYI- you can leave this recipe as is for plain vanilla ice cream, or add other fruits or flavorings to it. It seems to be pretty versatile. I made some more for my dad with bananas, and it was good as well.
~No-Cook Ice Cream~
1 cup of half and half
1 can of sweetened condensed milk
2 cups of heavy cream
1 1/2 teaspoons vanilla extract
5 very ripe peaches (or if using bananas- use 2 very ripe ones)
2 teaspoons of fresh lemon juice (I didn't use this for my peach, but I did for the banana)

1.) Mix together the first four ingredients until combined, making sure the condensed milk is well blended with the other liquids. Chill until cold.
2.) Pour mixture into an ice cream maker and freeze accordingly.
3.) Mash the peaches and add to the ice cream maker 2 minutes before it's finished. ( I went ahead and mixed the peaches in and skipped the refrigerating part, and it turned out fine.) 4.) Transfer ice cream to a freezer safe container, cover and freeze for at least 3 hours.

Saturday, July 25, 2009

Oatmeal Carmelitas


Ok...so this is really not the best picture in the world, but I can assure you- these are really good! I saw them on Mermaid Sweets, and decided they were just what my sweet tooth was calling for. They were chocolaty, gooey, crumbly, and a little salty all at the same time...SCORE! I will definitely make them again. Next time, I'll bake the bottom crust for a little less time, because it turned out a little too hard for my liking...but overall- delicious!

~Oatmeal Carmelitas~

Base

2 cups AP flour
2 cups quick-cooking oats
1 ½ cups packed brown sugar
1 tsp baking soda
½ teaspoon salt
1 ¼ cups butter or margarine, room temperature

Filling

1 jar caramel topping (1 cup)
3 tablespoons AP flour
1 cup (6 oz) semisweet chocolate chips or chocolate chunks
½ cup chopped nuts (salted) (I left them out)

1.) Preheat oven to 350 degrees.
2.) Line 13x9-inch pan with tin foil and leave some hanging over the edge. Grease tin foil with butter or cooking spray.
3.) In large bowl, whisk together flour, oats, baking soda and salt.
4.) In the bowl of a stand mixer (or another bowl with hand mixer) mix together the butter and brown sugar until combined.
5.) Add the flour mixture and mix on low speed until crumbly (do not over-mix or you will have a dough rather than crumbs).
6.)Reserve half of crumb mixture (about 3 cups) for topping. Press other half into bottom of pan and bake 10 minutes.
7.) In a small bowl mix caramel topping and 3 tablespoons of flour.
8.)When crust is done partially baking, sprinkle with chocolate chips or chunks and nuts.
9.) Drizzle evenly with caramel mixture.
10.) Sprinkle with reserved crumb mixture.

Bake 18-22 minutes longer until top is golden brown. Cool completely in pan on cooling rack, about 1 hour. Refrigerate until filling is set, 1-2 hours. Cut into bars.

Thursday, July 23, 2009

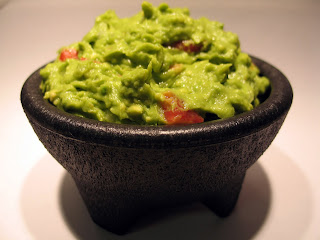
Guacamole


Today's recipe is one of Heath's favorites- guacamole! I can't understand how I love the smell of avocados, but don't really care for guacamole. I make it for him anyway, just because he loves it, and he says this is some of the best he's had. I got the recipe at Allrecipes, and it was a highly rated one. The only thing I left out of this, was the cilantro- just because I forgot to tell him to get it at the store, and I used only half a lime since Heath thinks the whole thing is too much for him. It is really simple to put together, so anyone who is a guacamole lover should try it!

~Guacamole~ from Allrecipes

Ingredients:

* 3 avocados - peeled, pitted, and mashed
* 1 lime, juiced
* 1 teaspoon salt
* 1/2 cup diced onion
* 3 tablespoons chopped fresh cilantro
* 2 roma (plum) tomatoes, diced
* 1 teaspoon minced garlic
* 1 pinch ground cayenne pepper (optional)

Have a great day everyone!

Tuesday, July 21, 2009

Hamburger Buns

Heath and I decided to go out one night, and his parents agreed to keep the boys. I told them not to worry with dinner before they came- that we would grill them a burger for dinner before we left. Then it hit me. I didn't have any buns! I had wanted to try them ever since I saw this recipe at The Sisters Dish- so I figured it was a sign that it was time to break down and give it a try. Even though I make yeast breads quite a bit, new recipes still intimidate me. I'll usually think about it for some time before I finally do it. I'm glad I was out of buns that day, because I don't know that I would have ever made them. It wasn't nearly as difficult as I had built it up in my head to be. They had a really nice, crispy outer crust, and the inside was perfectly soft. I snuck a taste before serving them to his parents, and I thought they were pretty good! They seemed to enjoy them too, so I'll probably make this again. Maybe next time with pulled pork!

~Hamburger Buns~

Ingredients:
* 1 cup lukewarm water
* 2 T unsalted butter, room temperature, creamed
* 1 egg
* 3 1/4 cup all-purpose flour
* 1/4 cup Castor sugar (very fine sugar, I didn't have any- so I put regular sugar into a pyrex bowl, and attacked it with my immersion blender stick)
* 1 t salt
* 1 T instant yeast
* 1 egg yolk (+1 T water)
* sesame seeds (optional)

Directions:

1.) Sprinkle the yeast into the water and leave for 5-10 minutes, until frothy. Stir to dissolve.

2.) Add remaining ingredients and mix well(I do this in my kitchen-aid). I let this knead in my Kitchen-Aid for ~10 minutes, until it is a soft, smooth dough. You could knead by hand on a lightly floured surface. I leave it in my mixer bowl, cover and let rise for 1 - 1 1/2 hour, until doubled in size.

3.) Divide dough into 8 pieces and shape into a flattened ball.

4.) Place the buns on a greased baking sheet, cover and let rise again for 30-40 minutes until puffy and doubled in size.

5.) Preheat oven to 375 degrees.

6.)Glaze the buns with egg yolk and water mixture, then sprinkle with sesame seeds if desired.

7.) Bake the buns for 12 - 15 minutes, until golden brown. Remove them from the oven and cool them on a wire rack.

Friday, July 17, 2009

Pizza Hut Pan-Style Pizza


Today's recipe comes from Laura over at Real Mom Kitchen (she got it from Day2Day with Holly J). I loved how this wasn't the traditional "roll out and bake on a pizza pan" recipe. I love a thick crust on my pizza sometimes, and this looked so delicious. The pizza you see above was Heath's. I made one for me and the kids with only pepperoni and cheese (of course I had to pick all the pepperoni off for the boys). His was made in a 9-inch round pie plate and the rest of the dough made up a nice-sized 9x13 pan for the rest of us. I took Laura's advice and only used a fraction of the oil the recipe called for. I also used Laura's homemade sauce recipe instead of the one that goes with this recipe. You can find her sauce recipe here. It is really good, and we had used it on other pizzas before so I knew I couldn't go wrong with it. Here is the original recipe- hope you try it soon, because it really is worth it!


~Pizza Hut Pan Pizza~


Dough:

* 1 1/3 C Warm water (105F)
* 1/4 C Non−fat dry milk
* 1/2 tsp Salt
* 4 C Flour
* 1 Tbsp Sugar
* 1 pk Dry yeast
* 2 Tbsp Vegetable oil (for dough)
* 9 Oz Vegetable oil (3 oz. per pan) - (I just use enough to coat the pan)
* Butter flavored Pam ( I didn't use this)

1. Put yeast, sugar, salt, and dry milk in a large (2 qt.) bowl. Add water and stir to mix well. Allow to sit for two minutes. Add oil and stir again. Add flour and stir until dough forms and flour is absorbed. Turn out on to a flat surface and knead for about 10 minutes.

2. Divide dough into three balls. In three 9" cake pans ( or can use 1 - 9 inch pie plate and 1 - 9 x 13 dish) , put 3 Oz. of oil in each making sure it is spread evenly.

4. Using a rolling pin, roll out each dough ball to about a 9" circle. Place in cake pans. Spray the outer edge of dough with Pam. Cover with a plate.

5. Place in warm area and allow to rise for 1 to 1 1/2 hours.

~Sauce~

* 1 (8 Oz) Can Tomato Sauce
* 1 tsp Dry Oregano
* 1/2 tsp Marjoram
* 1/2 tsp Dry Basil
* 1/2 tsp Garlic salt

1. Combine and let sit for 1 hour while the dough rises.
2. For Each Nine Inch Pizza:Preheat oven to 475F (I cooked at 450).
3. Spoon 1/3 cup sauce on dough and spread to within 1" of edge.

4. Distribute 1 1/2 Oz. shredded mozzarella cheese on sauce. Place toppings of your choice in this order: Pepperoni or Ham, Vegetables, Meats (cooked ground sausage or beef). Top with 3 Oz. mozzarella cheese.

5. Cook until cheese is bubbling and outer crust is brown (about 15 minutes). I then brush outer edge of crust with garlic butter.

Thursday, July 16, 2009

Pepperoni-and Cheese-Stuffed Chicken and My First Award!


This recipe comes from Cassie, who very kindly gave me an award yesterday! I will post about the award in a bit, but back to this yummy chicken. I made it a few weeks ago, after browsing through Cassie's blog. I had 4 last boneless chicken breasts in the freezer, and just wanted to make something different with them. Heath and I loved it, and Jasper and Sawyer did too- but of course, I had to pick all the pepperoni pieces out for them. They amaze me by eating things I have not seen many other kids touch, but then there are some things you would think they'd eat, that they don't like. It's puzzling. I say you can't go wrong with pepperoni and melted cheese. Period. The only change I made from Cassie's recipe is that I used sharp cheddar, and I sprinkled some on top as well as inside. I know. I'm bad. *sigh*

~Pepperoni-and Cheese-Stuffed Chicken Breasts~

Ingredients:

* Boneless skinless chicken breasts

* Sliced pepperoni

* Shredded cheese (I used sharp cheddar)

* Italian seasoning

* Garlic powder

* Salt and pepper


1. Preheat oven to 350 degrees.

2. Cut a slit about halfway into the side of each chicken breast. Stuff with a few slices of pepperoni (I used 4 medium slices per breast) and shredded cheese (I probably used about 1/8 cup per breast). Secure edges with toothpicks, if desired. Season both sides of chicken with Italian seasoning, garlic powder, salt and pepper.

3. Heat a small amout of olive oil in an oven-safe skillet over medium-high heat. Pan fry chicken breasts until browned on both sides.

4. Move skillet to oven. Bake chicken at 350 degrees for about 20 minutes or until cooked through.

Now, on to the award!! Cassie gave me this lovely award, and I am to pass it on to 15 other blogs I have recently discovered. So here it goes!


Passing it on to:

1. Real Mom Kitchen

2. Two Peas and Their Pod

3. Mennonite Girls Can Cook

4. The Sisters Dish

5. Tried-and-True Cooking with Heidi

6. Stirring the Pot

7. Cooking with Carrie

8. When Amber Cooks

9. cooking this and that

10. Delicious Meliscious

11. Sadie's Kitchen Adventures

12. Carrie's Sweet Life

13. Cara's Cravings

14. elly says opa!

15. Annie's Eats

Wednesday, July 15, 2009

Spagagna and Cheese Toast


I have seen baked spaghetti on a ton of other blogs lately, and we love it too. We call it spagagna (pronounced just like lasagna) at our house, because it is basically lasagna- only it has spaghetti noodles. It was born sometime in our first year of marriage when I was thinking regular spaghetti was getting pretty boring ( I made it quite a lot then, because I really didn't know how to cook much else). I added cheese, baked it, and declared it delicious! We had it again the other night, and I had forgotten just how good it was. We paired it with a cheese toast recipe I got from my sweet Aunt Susan a few years ago. I had several slices of my Wonderful White Bread left that were getting a little iffy- so I toasted them with this spread and it was a great match. This toast is also great served with taco soup or chili, which is what Aunt Susan served hers with. Hope you like it!


~Spagagna~ This makes enough for an 8x8, or 9x9 in casserole dish. You can always double it for a 9x13 dish.

Ingredients:
* 1 lb. ground beef, browned
* 1 (24 oz.) jar of your favorite spaghetti sauce (or use homemade if that's what you like)
* garlic powder
* 8 oz. package spaghetti noodles, cooked and drained
* shredded cheeses (I like to use a blend of mozzarella and cheddar)

Pre-heat oven to 375.

1.) Once your ground beef is browned, pour in your jar of spaghetti sauce. I like to add a little water to my empty jar and shake it a bit to get all the sauce in the bottom. Add that to your sauce mixture.

2.) Sprinkle mixture evenly with garlic powder, and stir that in.

3.) Simmer sauce for about 5 minutes (it's going to keep bubbling in the oven), and add your spaghetti noodles. Combine.

4.) Spray casserole dish with cooking spray, and add half noodle/sauce mixture.

5.) Sprinkle with half your cheeses ( I probably use 3/4 cup mozzarella, and 1/4-1/2 cup cheddar for each layer)

6.) repeat with remaining noodle mixture, and top with the rest of your cheese.

7.) Bake in preheated oven for 30-45 minutes, or until cheese is bubbly and browning on top.

~Aunt Susan's Garlic Cheese Toast Spread~ This recipe makes enough for quite a few bread slices, so I always make half a recipe. It made about 8 slices, and that's just right for my family of 4. And feel free to use more or less garlic or onion salt to suit your tastes. Sometimes, I have to go light on the garlic for Sawyer (my 16 month old).

Ingredients:
* bread slices (any bread works great, whatever is your favorite)
* 8 oz. shredded sharp cheddar
* 2 eggs
* 1/2 cup butter softened
* 1 tsp. garlic salt
* 1 tsp. onion salt

1.) mix and spread on sliced bread.
2.) cover and refrigerate for 8 hours. (I have always skipped this step, and it turns out fine)
3.) bake at 400 for 10-15 minutes.


Have a wonderful day!

Tuesday, July 14, 2009

The Best Chocolate Ice Cream...EVER!


I have been having so much fun with my new ice cream bowl attachment for my KitchenAid mixer. Heath has been after me to make him some chocolate ice cream with "only marshmallows" for a few weeks now, so a couple of days ago, I made it for him. I have read such great things about David Lebovitz and The Perfect Scoop, so it seemed like this would be the recipe to use. I knew this ice cream was going to be a dream not long after it had started churning. It was so smooth and creamy, and made up beautifully as soft serve, or frozen and scooped. I served it to Heath's parents after dinner that night, and they both really loved it (his mom is not even really a fan of chocolate). I am thinking now, of all the possibilities for add-ins to this recipe: peanut butter cups, crushed oreos, brownie pieces... Dangerous!


~Chocolate Ice Cream~ from The Perfect Scoop by David Lebovitz

2 cups heavy cream
3 tablespoons unsweetened Dutch-process cocoa powder
5 ounces bittersweet or semisweet chocolate, chopped
1 cup whole milk
¾ cup sugar
Pinch of salt
5 large egg yolks
½ teaspoon vanilla extract

1.) Warm 1 cup of the cream with the cocoa powder in a medium saucepan, whisking to thoroughly blend the cocoa. Bring to a boil, then reduce the heat and simmer at a very low boil for 30 seconds, whisking constantly. Remove from the heat and add the chopped chocolate, stirring until smooth. Then stir in the remaining 1 cup cream. Pour the mixture into a large bowl, scraping the saucepan as thoroughly as possible, and set a mesh strainer on top of the bowl.

2.) Warm the milk, sugar, and salt in the same saucepan. In a separate medium bowl, whisk together the egg yolks. Slowly pour the warm milk unto the egg yolks, whisking constantly, then scrape the warmed egg yolks back into the saucepan.

3.) Stir the mixture constantly over medium heat with a heatproof spatula, scraping the bottom as you stir, until the mixture thickens and coats the spatula. Pour the custard through the strainer and stir it into the chocolate mixture until smooth, then stir in the vanilla. Stir until cool over an ice bath.

4.) Chill the mixture thoroughly in the refrigerator, then freeze it in your ice cream maker according to the manufacturer’s instructions (If the cold mixture is too thick to pour into your machine, whisk it vigorously to thin out).

Makes about 1 quart

Monday, July 13, 2009

Iced Coffee


Happy Monday everyone! See that small, curious, blurry face in the picture? That's my 4 year-old Jasper, and he just had to be in the picture. =) Today, I wanted to post this iced coffee because ever since I figured out how to do it myself at home- I can't get enough! Heath doesn't care for iced coffee, but I really love it, and I spent a little too much on them last summer at "5-bucks". I'm really glad I ran across Christy's post at Southern Plate, because it has saved me a small fortune so far this hot, sticky Alabama summer. It's really easy, so if you like iced coffee- you need to make this. Who knows? Maybe I have now saved you a small fortune too!

You need:
*container to brew coffee grounds in (I use 2 pint jars)
*ground coffee beans (grind them yourself, or use the already ground stuff...that's what I do)
* coffee filters (large ones- the ones I use come in a black box and they are for a Bunn coffee-maker)
*strainer
* bowl to strain coffee into
Instructions:
1.) place 1 cup of coffee into your container or jar (you can use a large 32 oz. jar- or I like to use two pint jars)
2.) fill jar or jars with water, leaving a little space to shake the mixture.
3.) leave on counter at least 12 hours to brew.


Here are my jars brewing on the counter.

4.) Once time has passed (like Christy does- I start mine at night and strain them in the morning), place your strainer over a large bowl. (you can also use a colander if you prefer)

5.) line strainer with coffee filter, and pour coffee in and let strain (if you are using pint jars, pour the whole first jar- if using a large 32 oz jar, pour half). Be patient- it takes a little while. I just pour it in, and go do other things for a bit.

6.) switch out your filter, and strain the other half of your coffee.

7.) Once it's done straining, it's ready to drink, or you can just refrigerate it.

This is how I mix up my coffee. You can make it as strong on the coffee as you like it. I like it with half milk, half coffee, and splenda.

* In a measuring cup, measure 4 oz. coffee concentrate.

* Add 4 oz. milk (Use whatever you normally drink. I use skim)

* Add sugar or sweetener, and stir.

* Pour over ice, and enjoy.

The way I make mine (with skim milk and splenda) is only 45 calories. Can't beat that!

Saturday, July 11, 2009

Wonderful White Bread


There is just something about homemade bread, isn't there? We had a sweet elderly lady for a neighbor growing up, and she always sent us the most delicious homemade breads. The other day, I was flipping through one of my cookbooks and saw a banana bread recipe. Anytime I see banana bread, it immediately brings back memories of slicing off a piece of Mrs. Weaver's delicious homemade breads. I have made other yeast breads before- pizza dough, rolls, french bread, and even hamburger buns. But I realized I have never made an actual loaf of bread! We were coincidentally in need of throwing out our existing loaf of storebought sandwich bread. You know- the old routine where you pinch it a little and say, "Ah. It will be ok for another day."? Yep, we all do it, but this bread really needed to go, so I set out in search of the perfect sandwich bread. I finally settled on this Tyler Florence recipe* that I found on Stirring the Pot. Kim bakes most of her family's bread, so I figured I could trust her judgment. I was not disappointed...this bread is arguably the best (rolls, pizza dough, everything else included) that has ever come out of my kitchen. And I also have to say, I have never seen Jasper (my 4 year old) eat any bread with the crusts on it. He ate every crumb and never checked up. I thought,"What? You mean, I don't have to obsessively make sure that there is absolutely no brown part!?". He even asked for toast made out of it with jelly that night for his snack. That makes it worthy of baking for our weekly loaf if you ask me! The only issue I had, was that it started getting stale really fast, which is typical of homemade bread I think. So, when I bake our next loaf tomorrow, I am going to freeze half of it already sliced up so that I can just take out the pieces as I need them, and warm them a bit to soften them up.


* The ingredient list is not long for this recipe. The directions, however, are detailed and would probably take up this whole page of my blog. So, if you click on the link, it will take you to the Food Network site where you can get the recipe and read reviews and comments on it as well.


**The only change I made was to brush the loaf with melted butter instead of the egg white the recipe called for. I brushed it before baking and right out of the oven. It made the crust unbelievable!


Have a delicious day!

Friday, July 10, 2009

Fudge Puddles


I first saw these yummy cookies at Mommy's Kitchen. As soon as I saw them, they immediately went on my pathetic little paper list (I really need to organize) of recipes to try. When I finally decided it was time for me to make them, I made a mental note to get all of the ingredients at the store. It seemed like every week when we got groceries, I would forget the stinkin' butterscotch chips for the fudge filling! I don't usually keep butterscotch chips lying around, so it just escaped me completely. I think 3 weeks passed before I finally got around to making them. In any case, they are the perfect combination of peanut butter cookie, and fudgy chocolate evilness! Go ahead and make them. You'll eat a couple while they're still warm and gooey, and then try to refrain the rest of the day from sneaking your sticky little hand back in and getting more. Before you know it, they'll be gone- and you can come back here and curse me for getting you into this mess!


Fudge Puddles aka Puddles of Yum

Ingredients:

* 1/2 c. butter softened
* 1/2 c. creamy peanut butter
* 1/2 c. sugar
* 1/2 c. packed brown sugar
* 1 egg
* 1/2 t. vanilla extract
* 1/4 c. all-purpose flour
* 3/4 t. baking soda
* 1/2 t. salt

1.) In a large mixer bowl, combine butter, peanut butter, and both sugars.

2.) Beat in eggs and vanilla.

3.) In a separate bowl, mix the flour, baking soda, and salt.

4.) Gradually add flour mixture to creamy mixture.

5.) Chill in the refrigerator for at least an hour. (Or if you are impatient, chill it in the freezer for about 15 min. This is what I did.)

6.) Remove from fridge and form into 1-inch balls. (I used my Tbsp. measuring spoon which worked out great)

7.) Grease a mini-muffin pan, and add 1 ball to each muffin cup.

8.) Bake in a 325 degree oven for about 15 min. or until very lightly browned.

9.) Remove from oven, and make an indention in the center of each cookie.

10.) Let them cool in the pan for at least 5 min. and then move to a cooling rack.


Fudgy Filling

Ingredients:

* 1 cup semi-sweet chocolate chips
* 1 cup butterscotch chips (can use milk chocolate chips if you don't like butterscotch)
* 1 (14 oz.) can sweetened condensed milk
* 1 t. vanilla extract
* chopped nuts or sprinkles (optional- as you can see, I omitted them)

1.) In a microwave safe bowl or saucepan, combine all of the ingredients except the nuts or sprinkles.

2.) Microwave for 1 min. Stir well. (I melted mine in a saucepan on the stove, and it worked well)

3.) If there are still unmelted chips, continue to melt in microwave for 15 second increments until all smooth.

4.) Fill each cookie cup with fudge filling immediately, and allow to set for about an hour or so before eating or serving. Trust me- it's hot!! I tried it.

Thursday, July 9, 2009

Mean Guy's General Tso's Chicken


For my very first post, I thought I should post something Heath and I are both crazy about. We love Chinese food, and we go out and eat it whenever we can. Of course P.F. Chang's is one of our favorite places to go. They have their own version of General Tso's called Chang's Spicy Chicken. It is one of two dishes we order there, and it is delicious, but let's face it- eating out is expensive! So, I searched away until I found what I thought would be a good homemade version. I found it here at Recipezaar. I have to admit I did not cook this myself. This is Heath's specialty, and it will continue to be because...well...it's just better when someone else makes it. Right? We have made it quite a few times (served every time with white rice), and I couldn't even guess how many more times there will be. We always make something different for the boys whenever we have this because it is just too spicy for them. We always joke and say that we have burned up our taste buds, because the heat of the dish never phases us. Oh well, burn away..it is delicious!

Ingredients:
1 lb. chicken thigh, boned and cubed (we use boneless skinless breasts)
3 eggs, beaten
1/2 c. cornstarch, plus
2 tsp. cornstarch
5 dried chili pods
1 1/2 Tbsp. rice wine vinegar
2 Tbsp. rice wine (we use cooking sherry)
3 Tbsp. sugar
3 Tbsp. soy sauce
Directions:
1.) In a large bowl, thoroughly blend the 1/2 cup cornstarch and the eggs; add the chicken and toss to coat.
2.) If the mixture is too thick, add some vegetable oil to separate the pieces.
3.) In a small bowl, prepare the sauce mixture by combining the 2 tsp. cornstarch with the wine, vinegar, sugar, and soy sauce.
4.) First-Stage Frying: Heat 1-2 inches of peanut oil (we use vegetable) in a wok to medium-high heat (350-400).
5.) Fry the chicken in small batches, just long enough to cook the chicken through.
6.) Remove the chicken to absorbent paper and allow to stand (this step can be performed well in advance, along with the sauce mixture, with both refrigerated).
7.) Second-Stage Frying: Leave a tablespoon or two of oil in the wok.
8.) Add the pepper pods to the oil and stir-fry briefly, awakening the aroma but not burning them.
9.) Return the chicken to the wok and stir-fry until the pieces are crispy brown.
10.) The General's Favorite Sauce: Add the sauce mixture to the wok, tossing over the heat until the sauce caramelizes into a glaze (1-2 minutes).
11.) Serve immediately.